Working with a Device
Overview
Clicking a device's ID or Serial Number on the Devices list opens its detail page — headed Edit Device, with a live online/offline badge and the time it last checked in. From here you read its details, push settings, run diagnostics, and control it (reboot, factory reset, assign).
Navigation
ACS (TR-069) → Devices → (click a device)
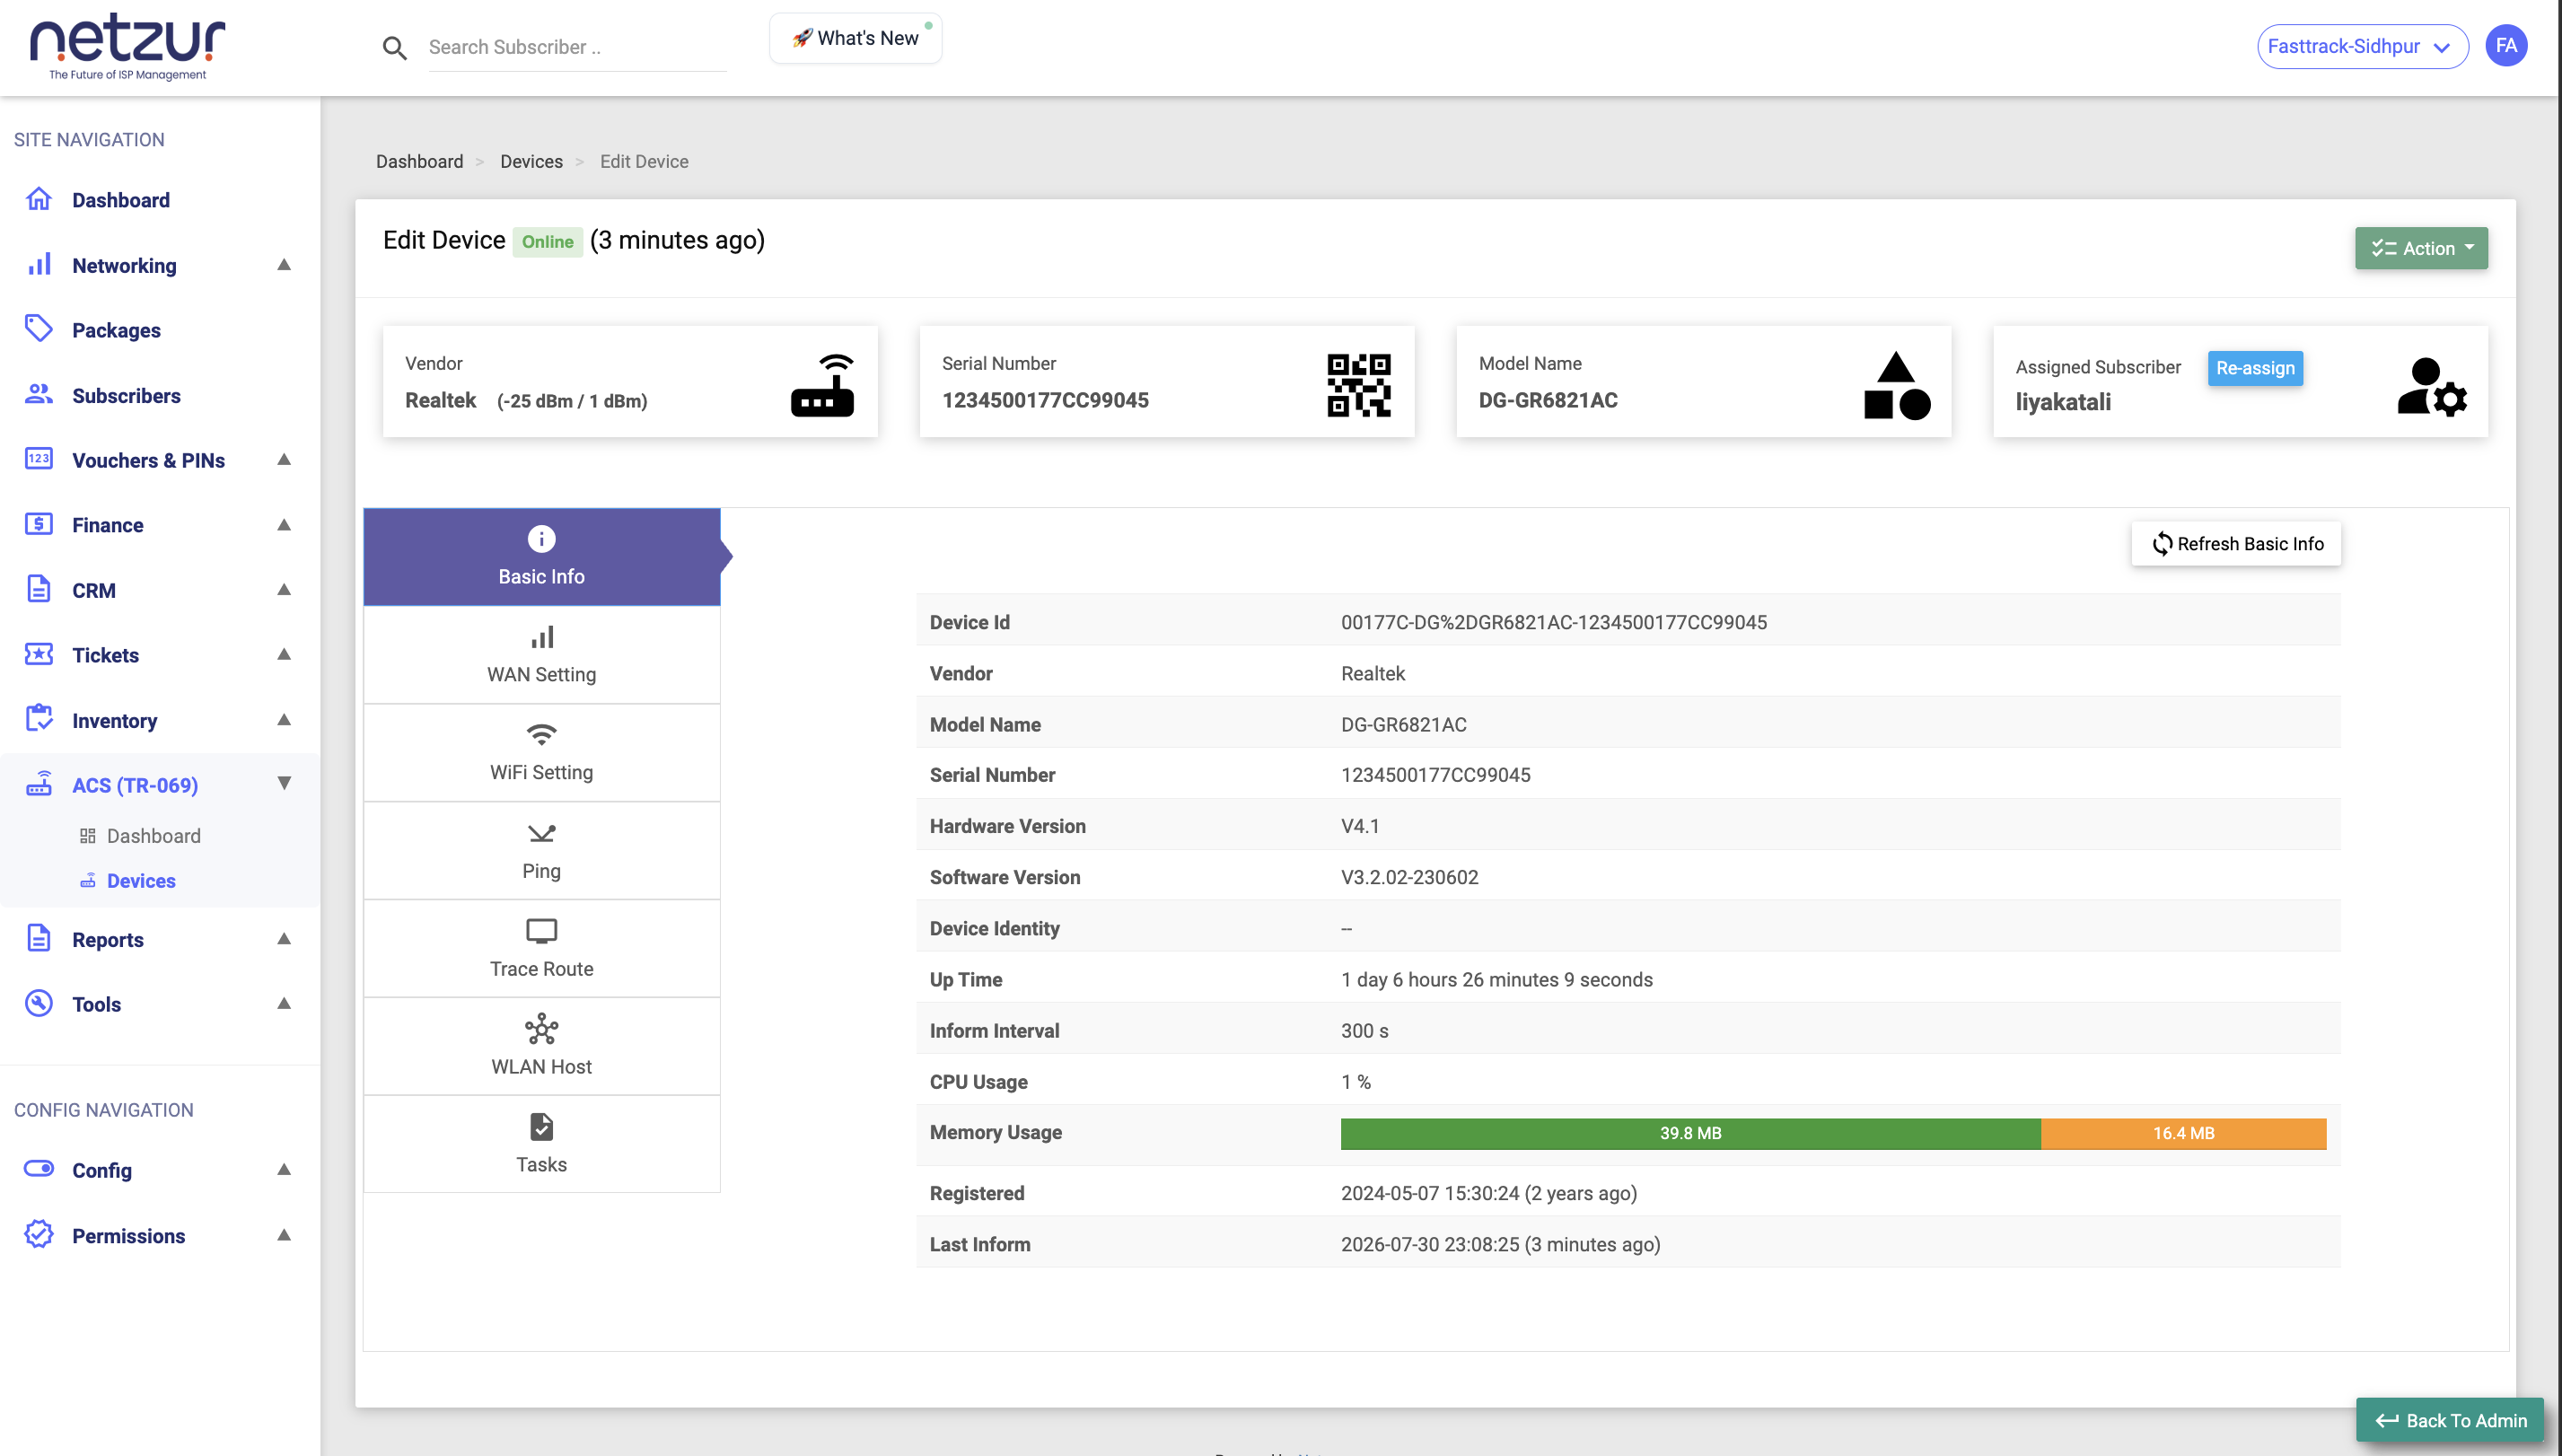
The page at a glance
- Header — the Edit Device title, the Online/Offline badge, and "last informed X ago". On the right is the Action menu (below).
- Info strip — four cards: Vendor (with optical Rx/Tx power for fibre ONUs, if reported), Serial Number, Model Name, and Assign Subscriber (the linked customer, or
--, with an Assign / Reassign button). - Tabs (down the left): Basic Info, WAN Setting, Wi-Fi Setting, Ping, Trace Route, WLAN Host, and Task.
The Action menu
The green Action button (top-right) opens the device's controls. Which appear depends on your permissions.
| Action | What it does | Pushes to the live device? |
|---|---|---|
| Assign | Link the device to a subscriber (see below). | Only if you enable Push WAN Config |
| Refresh All | Ask the device to re-report all its values, so the page shows current data. | No — read only |
| Reboot | Restart the device (see below). | Yes |
| Reset | Factory-reset the device (see below). | Yes |
Delete is not here — it lives on the Devices list as a bulk action.
Reboot
Restarts the device — the equivalent of power-cycling it. Settings are kept.
To prevent accidents, the confirmation asks you to type the word Reboot exactly before it will proceed. The device restarts the next time it picks up the command.
Factory Reset
Reset wipes the device back to factory defaults — all its custom Wi-Fi and WAN settings are erased.
Like Reboot, you must type the word Reset exactly to confirm.
⚠️ This is destructive and affects the live customer device. The customer will lose their Wi-Fi name/password and any on-device configuration until it's set up again. Use it only when you intend to start the device from scratch.
Assign to a subscriber
Links the device to a customer account (from the Action → Assign menu, or the Assign / Reassign button on the info strip).
- Subscriber — type at least two characters to search by username and select the customer. Required.
- Push WAN Config — a toggle, off by default:
- Off — the device is simply linked to the subscriber in the system. Nothing is sent to the hardware.
- On — reveals WAN fields (WAN Type PPPoE/IPoE, PPPoE username/password or IPoE IP/mask/gateway, VLAN ID, NAT) and, on save, pushes those settings to the live device. The subscriber's PPPoE username/password are pre-filled from their account.
Once assigned, the device counts as Assigned and the customer's name shows on the list.
Basic Info
The default tab — a read-out of what the device is and how it's doing. A Refresh Basic Info button (top-right) asks the device to re-report these values live.
| Field | Meaning |
|---|---|
| Device ID | The ACS's internal identifier. |
| Vendor / Model Name / Serial Number | The device's identity. |
| Hardware Version / Software Version | Hardware revision and firmware version. |
| Device Identity | The device's system name/identity. |
| Uptime | How long since it last rebooted (e.g. "3 days 4 hours"). |
| Inform Interval | How often the device checks in, in seconds. |
| CPU Usage | Current processor load. |
| Memory Usage | Used vs free memory. |
| Registered | When the device first appeared on your ACS (with "time ago"). |
| Last Inform | Its most recent check-in (with "time ago"). |
Refresh vs. live: the values shown are the last known ones. Click Refresh Basic Info (or Refresh All in the Action menu) and give the device a moment to respond to see the latest.
Important Notes
- Reboot and Reset act on the real customer device — always confirm you have the right one (check the serial number and assigned subscriber).
- Every action here (reboot, reset, refresh, assign) is recorded in the audit log.