The Onboarding Pipeline
Overview
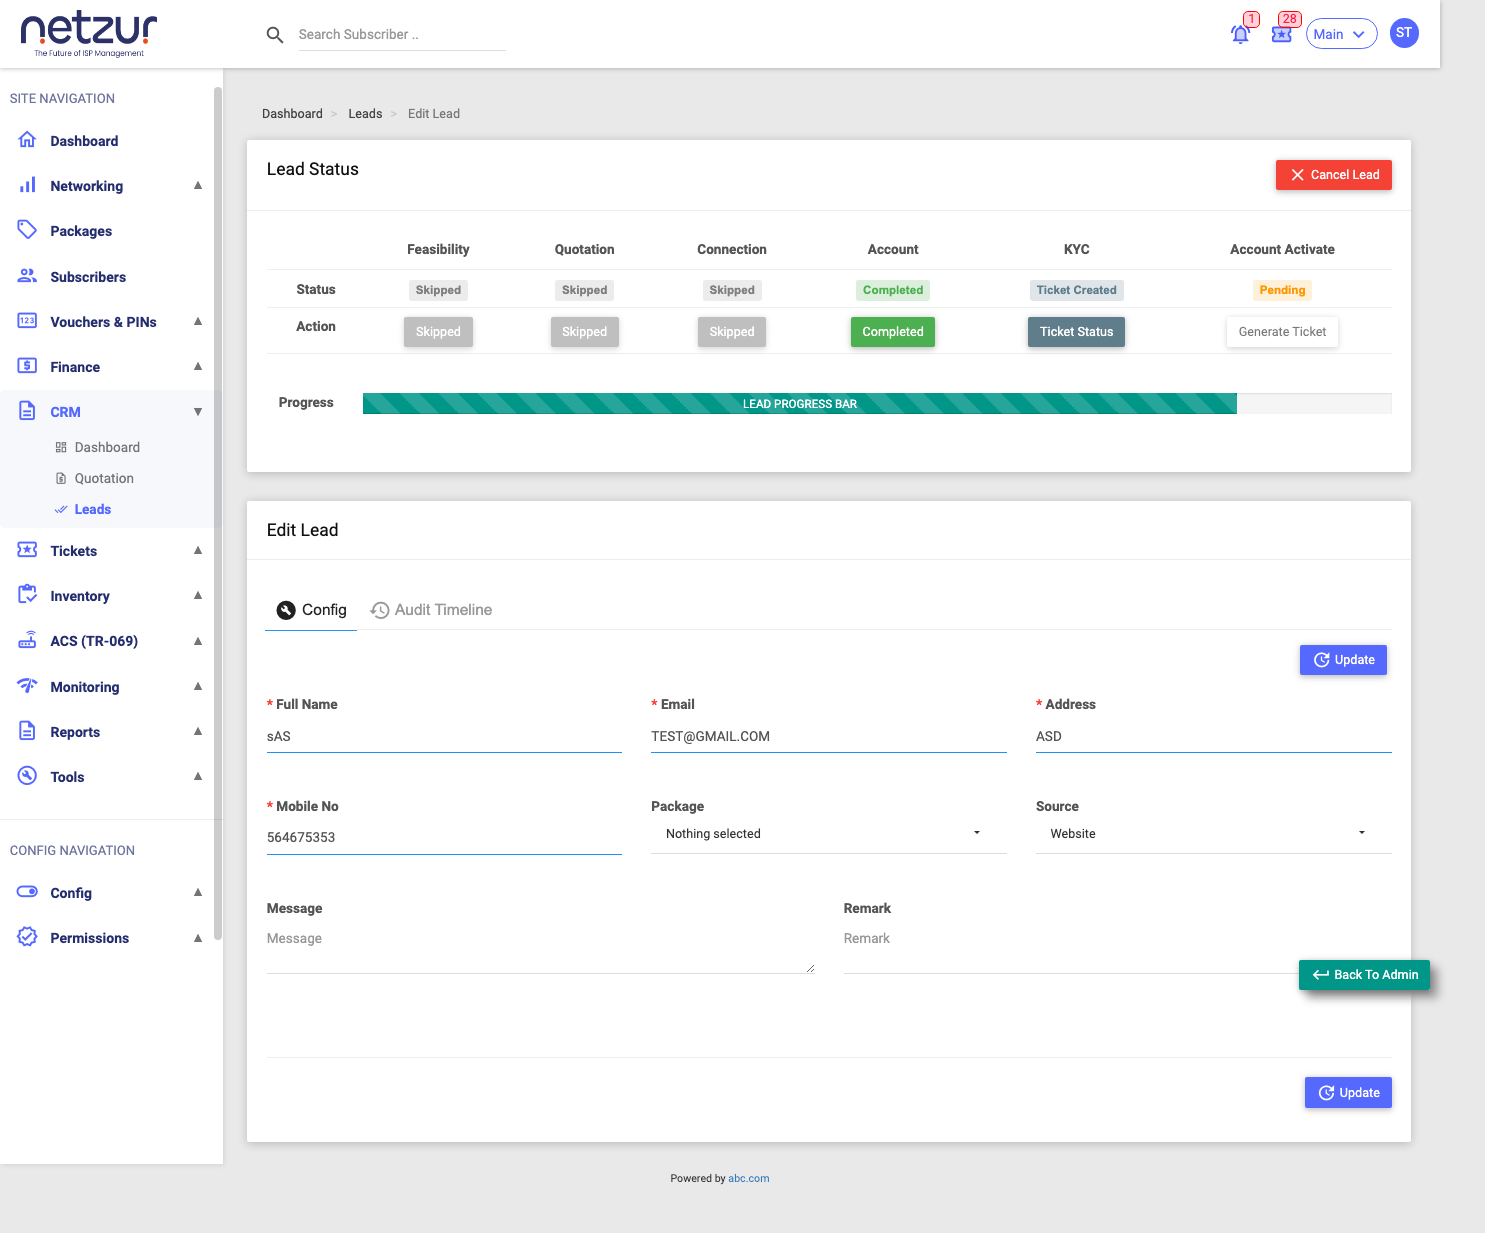
Opening a lead shows its onboarding pipeline — a row of six stages the prospect moves through to become a fully active subscriber, with a progress bar underneath. At each stage you either hand the work to an engineer (raise a ticket) or skip it, then confirm the result when it comes back. Below the pipeline is the lead's editable contact info (the same fields as the Add Lead form).
Navigation
CRM → Leads → (click a lead)
The six stages
In order, each stage represents one step of getting a customer connected:
| Stage | What it means |
|---|---|
| Feasibility | Can we actually serve this address? A survey confirms the network can reach them. |
| Quotation | Give the prospect a price — a quotation is prepared and accepted. |
| Connection | Physically install and provision the connection (cable, router/ONT, line-up). |
| Account (Account Create) | Create the subscriber account in the system — the prospect becomes a real subscriber record. |
| KYC | Collect and verify the customer's ID/address documents. |
| Account Activate | Activate/recharge the account so service goes live and the first invoice is generated. Completing this closes the lead (won). |
Stages are sequential — a stage's buttons only become active once the previous stage is Completed or Skipped.
Stage statuses
Each stage shows a Status badge and an Action button reflecting where it stands:
| Status | Meaning | Action available |
|---|---|---|
| Pending (orange) | Not started. | Generate Ticket or Skip |
| Ticket Created (grey-blue) | A task ticket was raised and is with an engineer. | Ticket Status (view only) |
| Ticket Resolved (grey-blue) | The engineer finished the task; it's back for your sign-off. | Confirm / Reject |
| Completed (green) | The stage is done and accepted. | Completed (view only) |
| Skipped (grey) | You chose to bypass this stage. | Skipped (disabled) |
The progress bar
The LEAD PROGRESS BAR under the stages fills up as the lead advances — from a barely-started 5%, through each stage, to 100% when the last stage completes (or is skipped) and the lead closes. It's teal normally, and turns red if the lead is cancelled.
The actions
Generate Ticket (raise a task)
For a Pending stage, Generate Ticket hands the work to your team. It opens the Add Ticket form where you:
- Choose Assign Engg / Employee — the person responsible (required).
- Add an optional Remark.
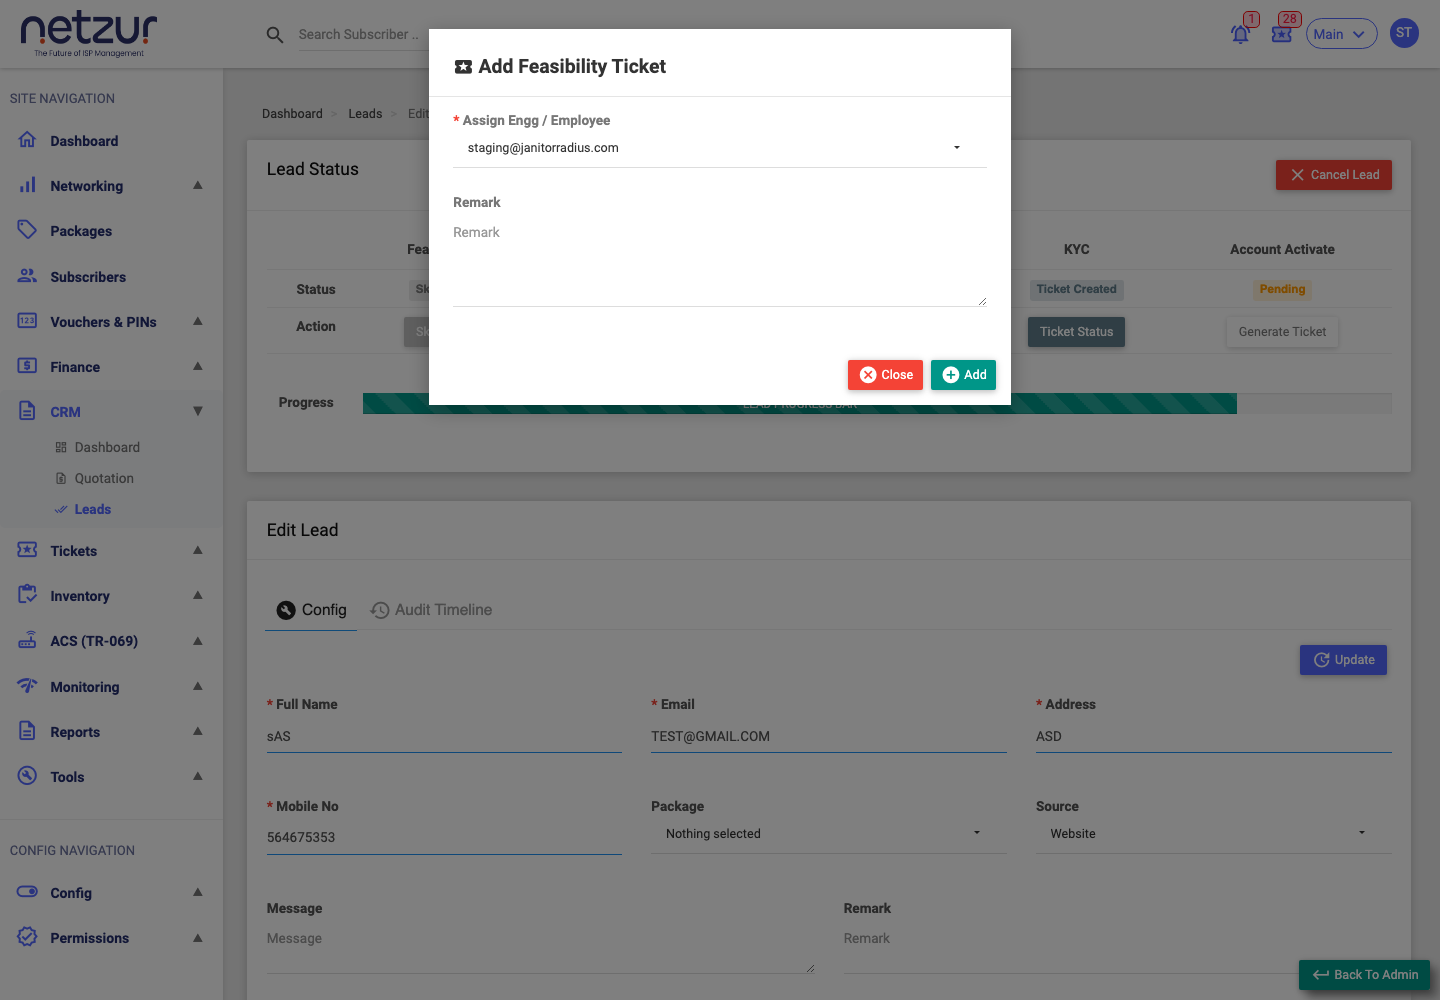
Saving creates a ticket (tagged with the stage name, priority Low, group Technical) and moves the stage to Ticket Created. The engineer then does the work and resolves the ticket in the Tickets area, which brings the stage back to you as Ticket Resolved.
Skip
For a Pending stage, Skip bypasses it (after a confirmation). The stage becomes Skipped, and the pipeline moves on to the next stage. Skipping the KYC stage marks the subscriber as KYC-verified; skipping Account Activate closes the lead.
Ticket Status
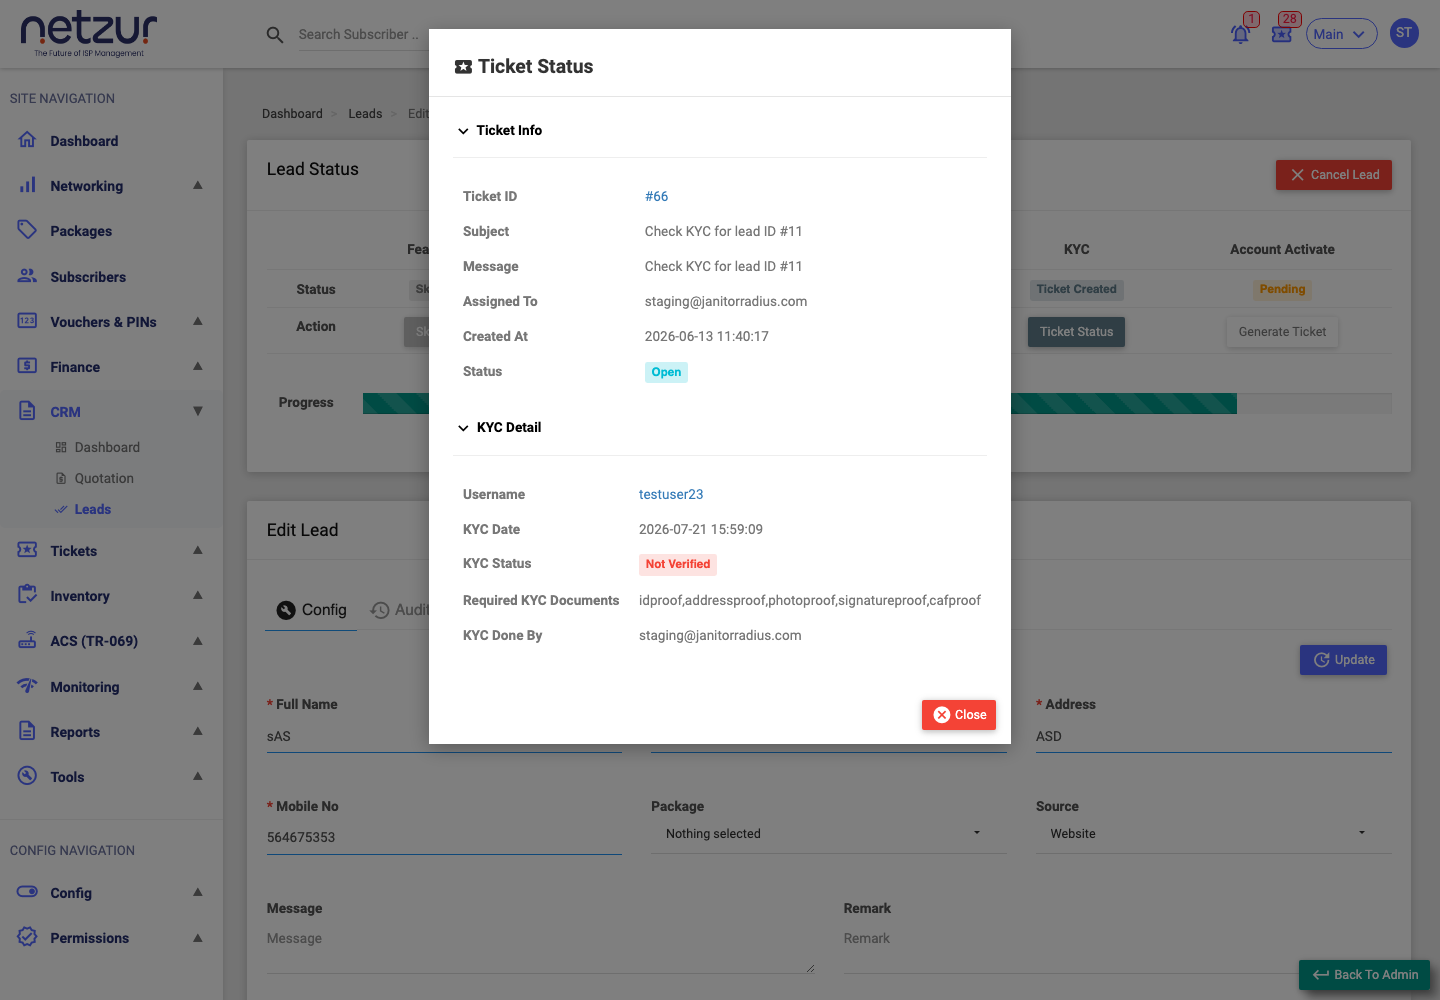
While a stage is Ticket Created, Ticket Status lets you view the ticket's current state (subject, message, who it's assigned to, status) without changing anything. It also shows that stage's detail panel — for example, the KYC documents and verification status:
Confirm / Reject
When a stage is Ticket Resolved, you review the result and decide:
- Confirm — accept it. The stage becomes Completed and the pipeline moves on. Confirming the Account Activate stage closes the lead (won).
- Reject — send it back. The ticket re-opens and the stage returns to Ticket Created. Rejecting also undoes any link made at that stage (e.g. unlinks the attached quotation or the created subscriber, or un-verifies KYC).
What each stage shows
When you open a stage that has a result, a detail panel summarises it:
- Quotation — the attached quotation's number, date and amount (links to the quotation).
- Account — the created subscriber's username and type (links to the subscriber).
- KYC — the subscriber, the required documents, and whether they're Verified.
- Account Activate — the package, the generated invoice total, and when/by whom it was recharged.
Becoming a subscriber
The lead turns into a real customer across the back half of the pipeline:
- Account creates the subscriber account and links it to the lead.
- KYC verifies their documents (or is skipped).
- Account Activate activates/recharges the account — service goes live and the first invoice is raised.
When the last stage completes or is skipped, the lead closes (progress 100%, status Closed) and the person is now an active subscriber, billed through Finance.
Cancelling a lead
The red Cancel Lead button (top-right) stops onboarding: it marks the lead Cancelled, turns the progress bar red, closes any open tickets on the lead, and locks the page. Use it when a prospect drops out. (A cancelled lead stays on record; to remove it entirely, delete it from the list.)
Important Notes
- Stages must be done in order — you can't jump ahead until the previous stage is Completed or Skipped.
- Reject cleanly undoes a stage's result, so a wrong quotation or account can be sent back and redone.