Add an IPv4 Pool
Overview
This page explains how to create a new IPv4 address pool by giving it a name and the start and end of the address range.
Who Can Use This Feature
Network administrators and engineers.
Required Permissions
- IPv4 Pool → Add.
Prerequisites
- You know the first and last address of the range you want to make available.
Navigation
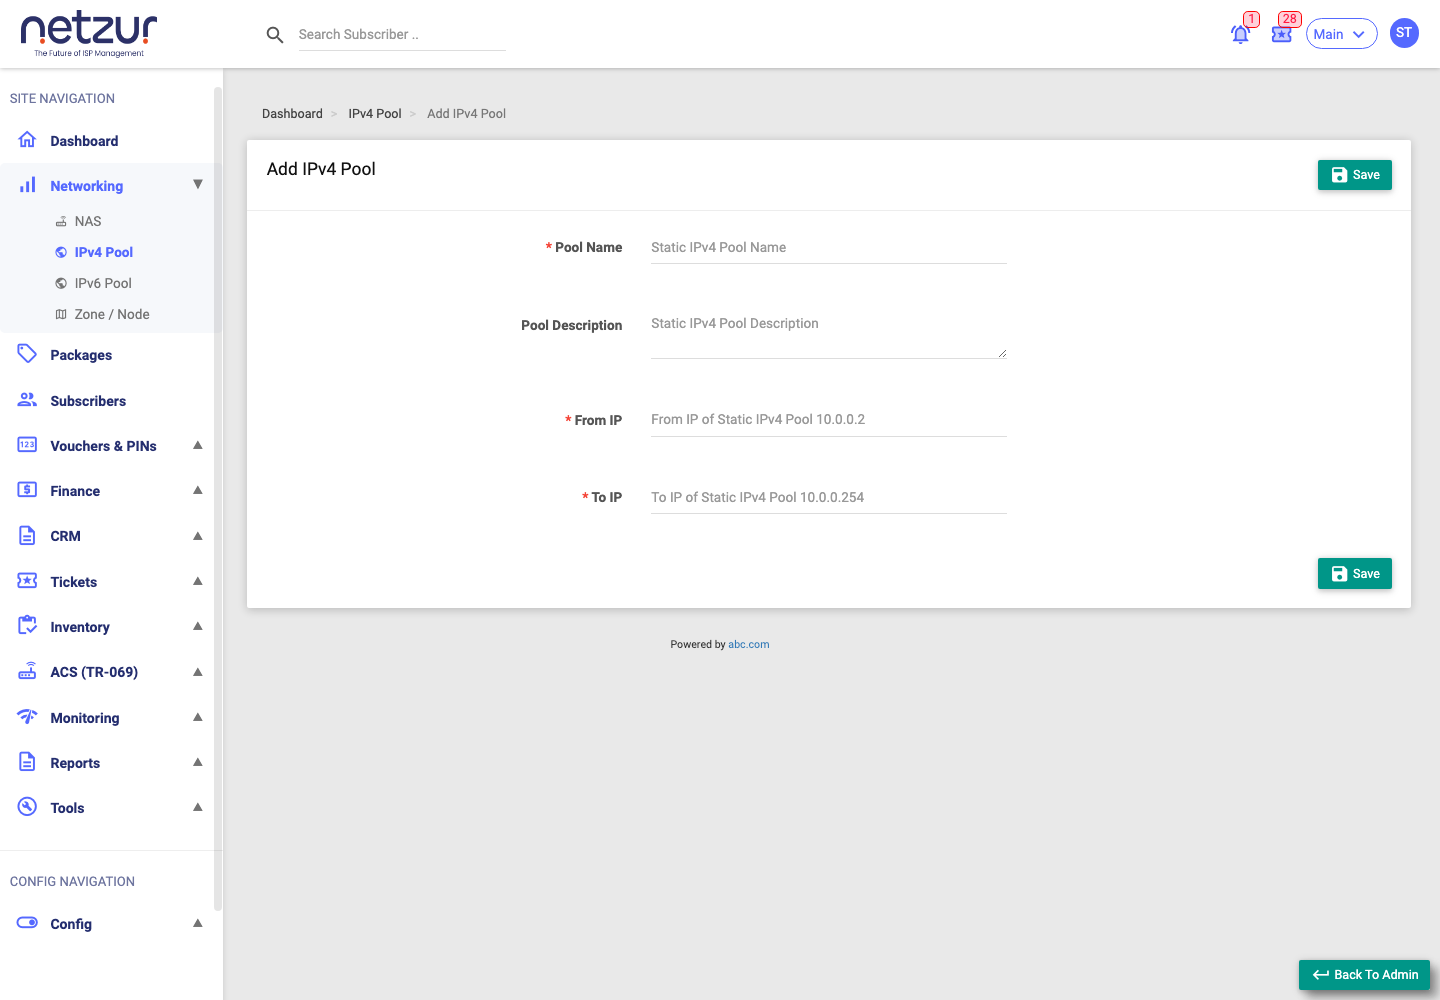
Networking → IPv4 Pool → Add IPv4 Pool
Step-by-Step Instructions
- Go to Networking → IPv4 Pool and select Add IPv4 Pool.
- Enter a Pool Name.
- (Optional) Add a Pool Description.
- Enter the From IP — the first address in the range.
- Enter the To IP — the last address in the range.
- Select Save.
Field Reference
| Field | Required | Description | Example |
|---|---|---|---|
| Pool Name | Yes | A name to identify the pool. | Static-Block-A |
| Pool Description | No | A note about the pool's purpose. | Business customers |
| From IP | Yes | First address in the range. | 203.0.113.10 |
| To IP | Yes | Last address in the range. | 203.0.113.60 |
What Happens After Saving
The pool is created and its addresses become available to assign to subscribers who need a static IPv4 address. You can then track usage from the pool's used addresses view.
Important Notes
- Make sure the range does not overlap another pool.
- Only assign addresses your ISP actually controls/routes.
Common Mistakes
- Swapping From IP and To IP.
- Creating a range that overlaps an existing pool.
Troubleshooting
| Problem | Likely cause | What to do |
|---|---|---|
| Save is rejected | From/To not valid, or reversed | Check the addresses are valid and From is lower than To. |
| Addresses don't appear for assignment | Range overlaps or pool disabled | Confirm the range and that the pool saved correctly. |