Creating a Ticket
Overview
Add Ticket raises a new support ticket against a subscriber. You set the subject, message, priority, group and due date; the ticket is then assigned and the customer is notified.
Required Permissions
- Ticket → Add.
Navigation
Tickets → Add
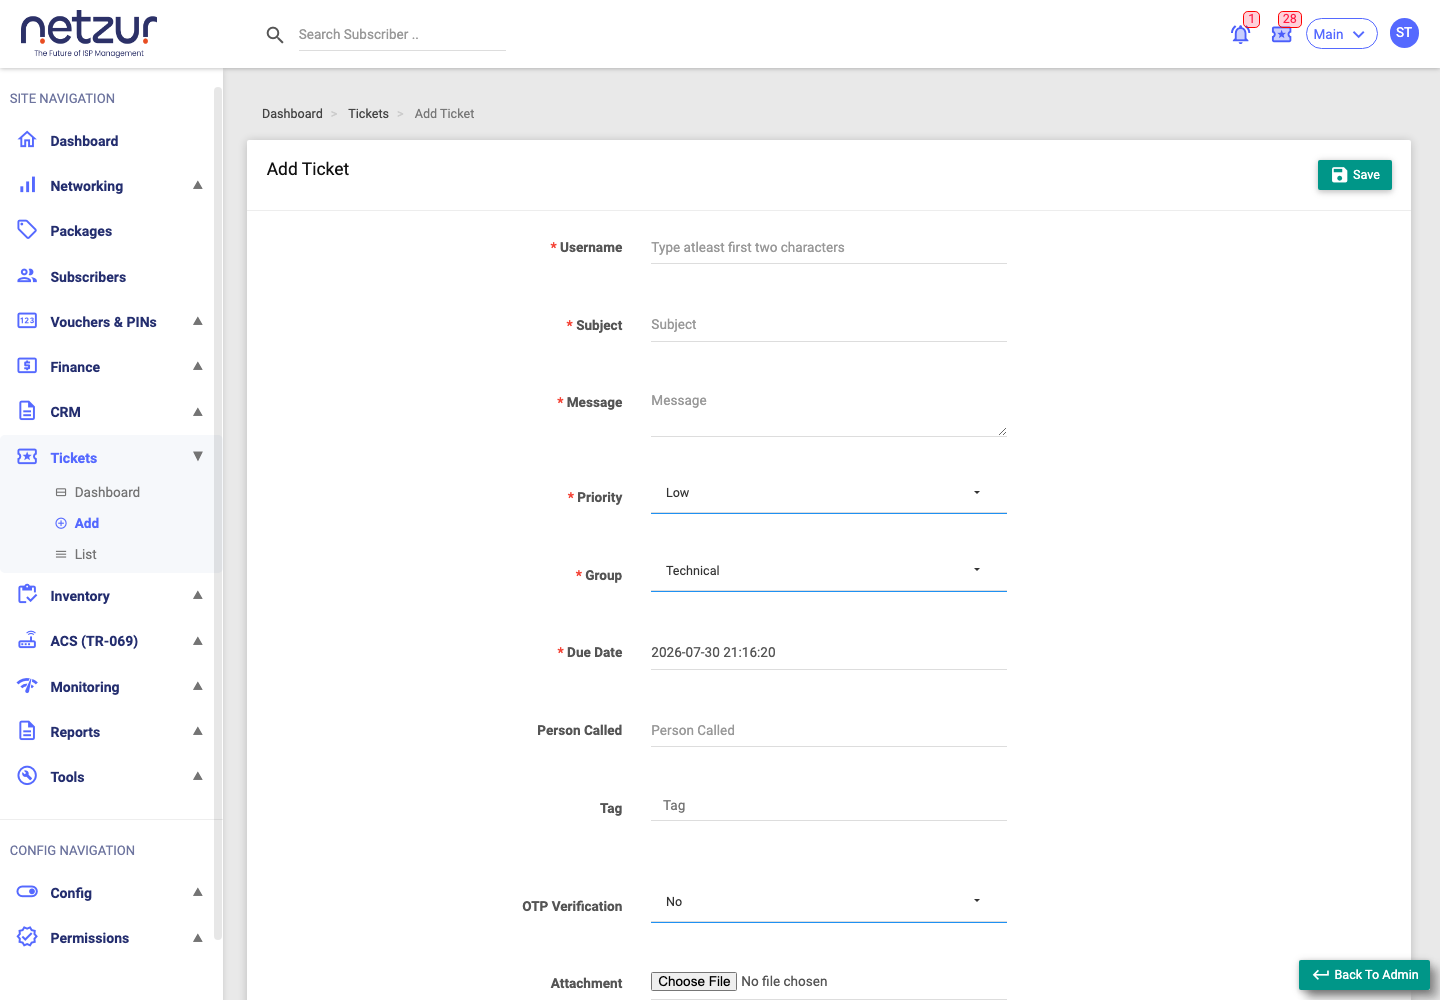
The form
| Field | Required | Description |
|---|---|---|
| Username | Yes | The subscriber the ticket is for — type at least two characters to search and select. |
| Subject | Yes | A short title. Previously-used subjects appear as suggestions (templates) — picking one auto-fills the message and tags. |
| Message | Yes | The description. This becomes the first comment in the ticket's conversation. |
| Priority | Yes | Low, Medium, High or Urgent (default Low). |
| Group | Yes | Technical or Sales — the department that handles it. |
| Due Date | Yes | When it should be resolved by. Overdue tickets show a red Due badge. |
| Person Called | No | Who was contacted (free text). |
| Tag | No | Comma-separated labels for grouping/searching. |
| OTP Verification | No | Yes requires an OTP from the customer to close the ticket later; No doesn't. |
| Attachment | No | A file (PNG, JPEG or PDF). |
Select Save. You'll see "Ticket added successfully" and land on the new ticket's workspace.
What happens on save
- The ticket is created as Open and assigned automatically — usually to you (the creator). You can hand it to someone else later with Re-assign on the ticket page.
- The customer is notified by email/WhatsApp (per your site's settings).
- If the subject was new, it's saved as a template so you can reuse it next time.
Important Notes
- There's no "assign to" field on this form — assignment is automatic on create, then changed on the ticket page.
- Turn on OTP Verification for tickets where you want the customer to confirm the fix before it's closed.